Hyper-V
is a virtualization product which is built into most Microsoft Server and
Client Operating Systems today.
The
following are the Hardware requirements for installing Hyper-V
1. You will need a 64-bit processor with SLAT (Second Level Address
Translation), most processors ie. Core i3/i5/i7/Xeon have this feature.
2. Ensure that you have enabled Virtualization support in the
BIOS/UEFI
Once
you have met the above requirements you are now ready to install Hyper-V, in
this example, we are using Windows Server 2016 standard edition.
Open the Server Manager
Window and click on “Add roles and features”
On the
“Add Roles and Features Wizard” page click next
Select
“Role-based or feature-based installation” and click next
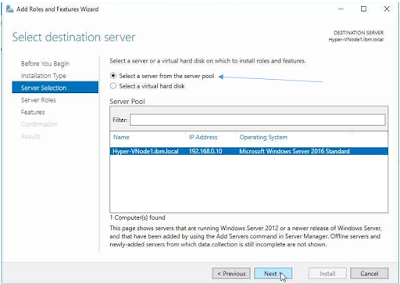
Ensure that select your server from the pool, in case you see
multiple servers, select the correct server and click next.
Select
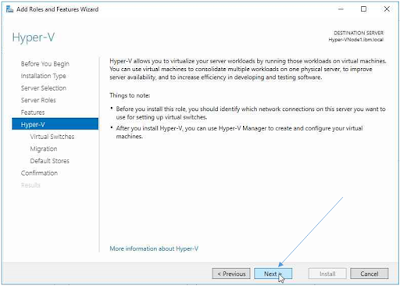
Hyper-V from the list of roles
On the
“Select Features” page, click next
On the
above page click Next
On the
Create Virtual Switches page you will see your HOST nic card, in a situation
where you see multiple NIC’s , select the one that you want to use to
communicate with the production network or to other clients on the Network, for
more information on Hyper-V switches click here.
Select
your NIC card and click next.
In case you need the Live
Migration feature select “Allow this Server…” , my suggestion is not to select
it now, you can always configure it later.
Select the default location
for the Virtual Hard disk files and configuration files. If you are in a test
lab environment then leave it to default, if in production then change the path
to a proper storage location.
Select
the option “restart the destination Server automatically if required”
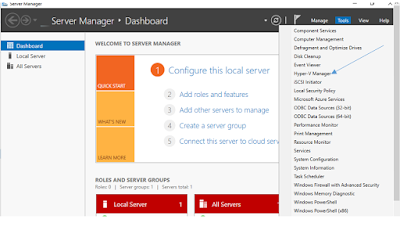
Once the Server restarts,
open Server Manager and you will see the HYPER-V Manager option, click on it.


No comments:
Post a Comment